Upgrade! Pavtube Mac Now Support El Capitan


Pavtube upgrades with support for Mac OS X El Capitan for all its Mac Blu-ray/DVD/Video products, all media converting, playing and editing issues can be solved on El Capitan with Pavtube Mac Products. 

The newly arrived Mac OS X El Capitan featuring the ability to run multiple apps is fantastic. But people are out of luck to entertain themselves with various media files on the new operating system since most Mac video conversion application are not updated with support for El Capitan. To get all those issues fixed up, Pavtube Studio 
Pavtube Sutio has recently updated all its Mac Blu-ray/DVD/Video products with perfect support for Mac’s new operating system - Mac OS X El Capitan. Products that works compatible well with El Capitan including: Pavtube Video Converter for MacPavtube HD Video Converter for MacPavtube MTS/M2TS Converter for MacPavtube MXF Converter for MacPavtube iMixMXFPavtube BDMagic for MacPavtube ByteCopy for MacPavtube DVDAid for MacPavtube iMedia Converter for Mac


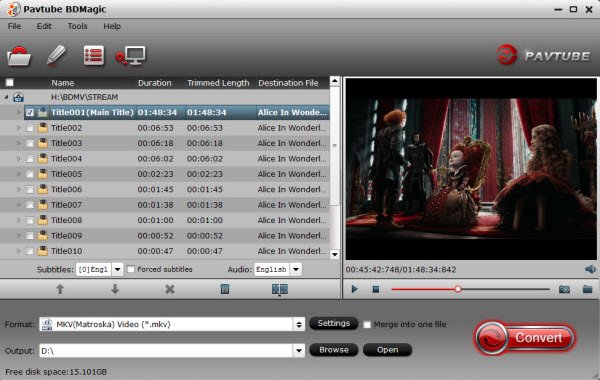
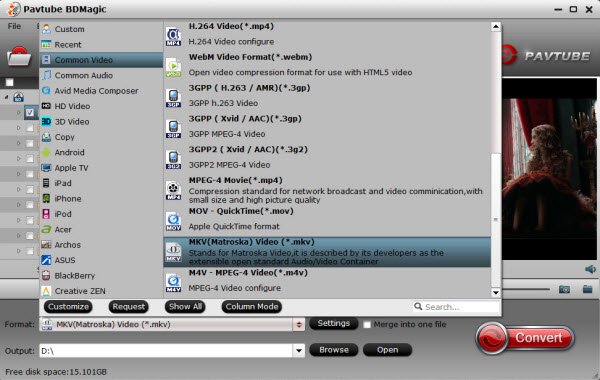
Copy/Backup Blu-ray/DVD on El Capitan 
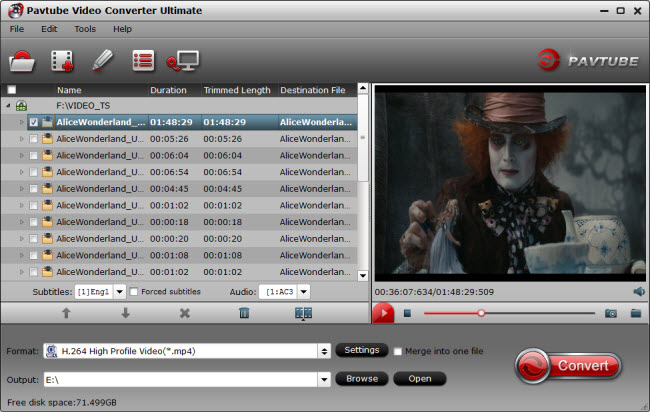
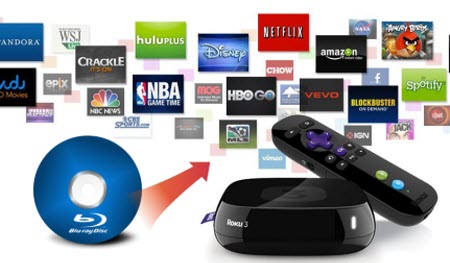
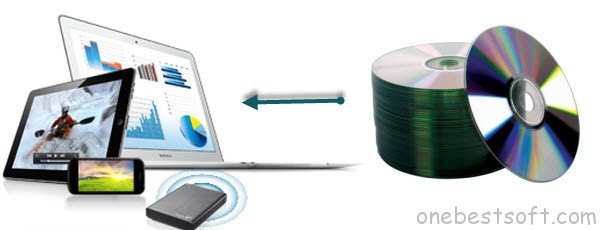
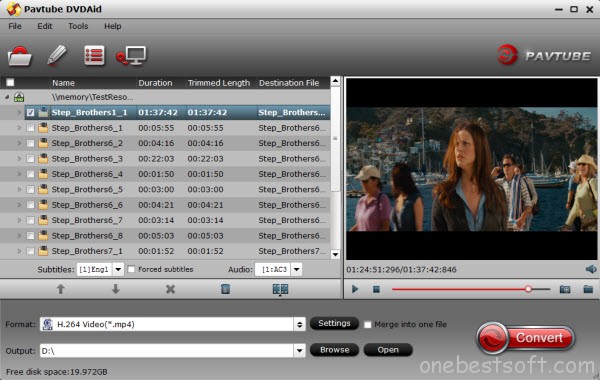
Have problem to copy/backup Blu-ray/DVD disc on Mac OS X El Capitan, never mind, with Pavtube newly upgraded Blu-ray/DVD products, you will get no difficulty to make a full disc copy or the main movie copy of the original 2D/3D Blu-ray/DVD disc on Mac OS X El Capitan. Besides that, the program also enables you to rip/convert Blu-ray/DVD disc to various different file formats on El Capitan platform for playing on iPhone/iPad/iPod, Android phone and tablets, Windows phones or tablets, game consoles, HD media players, streaming to Apple TV/Amazon Fire TV/Roku, etc. 

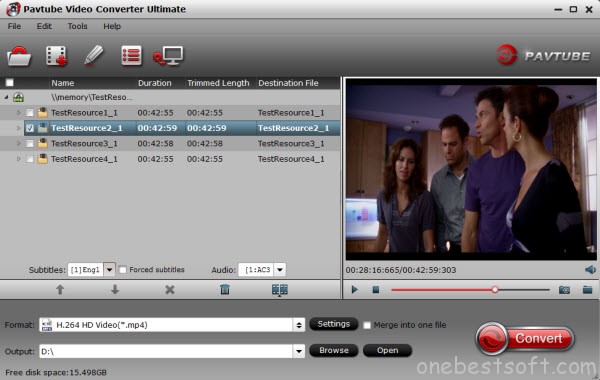
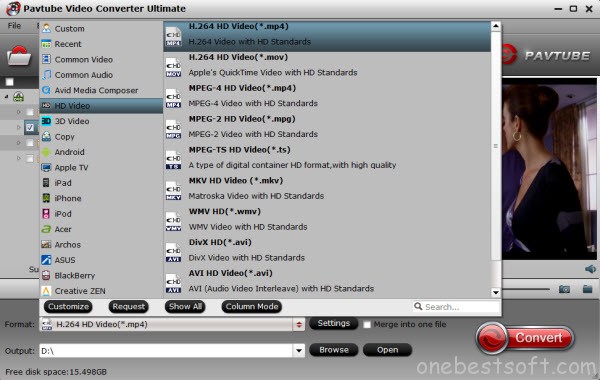
Play and edit videos on El Capitan 
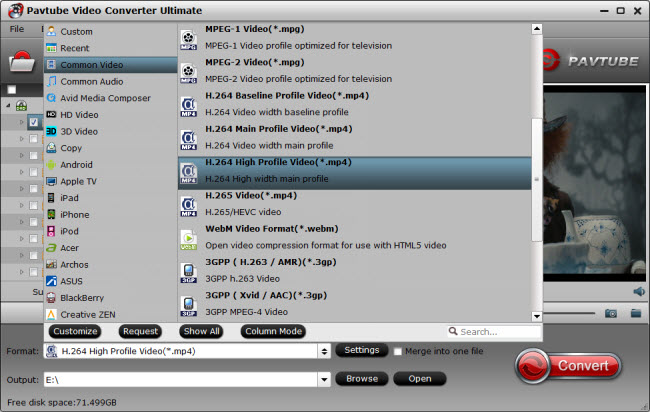
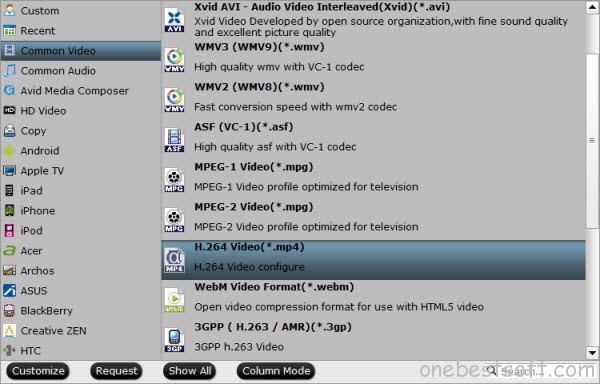
Play and edit any video files on Mac OS X El Capitan can also be easily achieved with Pavtube upgraded Mac Video Converter applications. You can effectively convert virtually any file formats including AVI, WMV, MP4, MOV, FLV, VOB, MKV, MKV, MTS, M2TS, Tivo, H.265 in SD, HD, 2K, 4K videos to your desired file formats or devices and programs optimized file formats for better viewing. For camera and camcorder users, you will have a fast and fluid workflow on Mac OS X El Capitan with our program by exporting professional video editing codec such as Apple Prores Codec for Final Cut Pro 6/7/x, Apple Intermediate Codec(AIC) for iMovie/Final Cut Express, DNxHD MOV for Avid Media Composer, After Effects CC/Adobe Premiere Pro/Adobe Premiere Elements/Sony Vegas specially optimized file formats, etc. 

Other downloads: 

BDMagic for Mac 
- Pavtube old official address: http://www.pavtube.cn/blu-ray-ripper-mac/ 
- Cnet Download: http://download.cnet.com/Pavtube-BDMagic/3000-7970_4-76177782.html 

ByteCopy for Mac 
- Pavtube old official address: http://www.pavtube.cn/bytecopy-mac/ 
- Cnet Download: http://download.cnet.com/Pavtube-ByteCopy/3000-7970_4-76177783.html 

iMedia Converter for Mac 
- Pavtube old official address: http://www.pavtube.cn/imedia-converter-mac/ 
- Cnet Download: http://download.cnet.com/Pavtube-iMedia-Converter/3000-2194_4-76177788.html 

Video Converter for Mac 
- Pavtube old official address: http://www.pavtube.com/video-converter-mac/ 
- Amazon Store Download: http://www.amazon.com/Pavtube-Video-Converter-Mac-Download/dp/B00QIBK0TQ 
- Cnet Download: http://download.cnet.com/Pavtube-Video-Converter/3000-2194_4-76179460.html 

HD Video Converter for Mac 
- Pavtube old official address: http://www.pavtube.com/hd-video-converter-mac/ 
- Amazon Store Download: http://www.amazon.com/Pavtube-Video-Converter-Mac-Download/dp/B00QI9GNZS 
- AppStore Download: https://itunes.apple.com/de/app/pavtube-hd-video-converter/id502792488?mt=12 
- Cnet Download: http://download.cnet.com/Pavtube-HD-Video-Converter/3000-2194_4-76177786.html 

MTS/M2TS Converter for Mac 
- Pavtube old official address: http://www.pavtube.com/mts-converter-mac/ 
- Amazon Download: http://www.amazon.com/Pavtube-MTS-M2TS-Converter-Download/dp/B00QIE3U0Y 
- Cnet Download: http://download.cnet.com/Pavtube-MTS-M2TS-Converter/3000-2194_4-76177029.html 

MXF Converter for Mac 
- Pavtube old official address: http://www.pavtube.com/mxf-converter-mac/ 
- AppStore Download: https://itunes.apple.com/us/app/pavtube-mxf-converter/id502807634?mt=12 
- Amazon Download: http://www.amazon.com/Pavtube-MXF-Converter-Mac-Download/dp/B00QID8K28 
- Cnet Download: http://download.cnet.com/Pavtube-MXF-Converter/3000-2194_4-76177789.html 

iMixMXF 
- Pavtube old official address: http://www.pavtube.com/imixmxf-mac/ 
- Amazon Download: http://www.amazon.com/Pavtube-Studio-iMixMXF-Download/dp/B00QI7MY4Y 
- Cnet Download: http://download.cnet.com/Pavtube-iMixMXF/3000-2194_4-76171460.html 

Further Reading: 
Best Way to Edit Video Files on Mac OS X El Capitan 
Convert Videos on Mac OS X El Capitan with Top Video Converter 
Lossless Backup Blu-ray to MKV on Mac OS X El Capitan 
Convert MXF Files on Mac OS X El Capitan 
3D Blu-ray Main Movie Backup Solution for Mac OS X El Capitan 
Play 4K Videos on Mac OS X El Capitan 


Stream MKV, AVI, M2TS, TS, VOB to Roku 3 via Plex on Windows 10


There are more and more people getting fond of the new Roku 3, the best combination of on-demand media and easy access to personal extensive media library that made Roku’s case, not to mention an attractive price tag. The only problem you may encounter is thatmany video types are not accepted by Roku 3, for example MKV, AVI, M2TS, TS, VOB. 


The Roku 3 only supports H.264 MKV and MP4/M4V video, and to play these video files on Roku with Plex, you will need a practical converter to make it happen. Pavtube Video Converter Ultimate (Learn why choose it) is recommended as the best MKV/AVI/M2TS/TS/VOB to Roku 3 converter. With it, you can easily convert MKV, AVI, M2TS, TS, VOB video to MP4 (H.264) for Roku 3 on Windows 10 with high video quality. Taking advantage of GPU acceleration technoly, this software application speed up conversion process in an insanely way. 


Step 1: Free download and launch Pavtube Video Converter Ultimate on your computer. Add source video to the software by clicking the “Add video” button on the main UI. 


Step 2: Then click Format > Common Video and set H.264 High Profile Video(*.mp4) as output video format. The reason mp4 is the target format is that it is commonly supported by almost all multimedia players, and the file size will be reasonable small and the video quality remains. 


Step 3: Now, hit the “Convert” button to star converting MKV/AVI/M2TS/TS/VOB to mp4 for Roku 3 playback with Plex on Windows 10. After the conversion is completed, transfer the converted videos to Roku’s SD card or to a USB stick that can be attached to Roku 3 streaming player. Now you can enjoy your movies with Roku 3.How to Play Movies on Your Roku 3 from a USB Drive 

1. Install the Roku Media Player channel, either through the Channel Store on your Roku or via Roku’s website. 
2. Add the video file to your external USB drive from your computer. The Roku 3 can play MKV, MP4 and MOV files. 
3. Connect the USB drive to the Roku 3′s USB port, located on the right side of the box. 
4. Launch the Roku Media Player channel and select Videos. 
5. Choose the drive that’s attached to the Roku 3. 
6. Navigate to the folder that has the video file you want to watch. Click OK to open the folder. 
7. Select the video to watch and click Play on the remote. 
You can also use the Roku Media Player channel to listen to music or view photos from a USB drive. Play an entire folder of music files by pressing Play on the remote while on a folder, or navigate to a specific track to play only that song. For photos, you can start a slideshow by pressing play while on a folder of photos. 

More 

Play Anime DVD movies with VLC player on Macbook 
iTunes movie new releases can't play via Roku? 
Put DVD on Western Digital My Cloud for Sharing 
Rip Blu-ray to SBS 3D MP4 for 3D TV watching on Mac 
Effective Way to Play 3D Blu-ray on Apple TV 4 
Find and add proper SRT/ASS/SSA subtitles to DVD Movies and TV Shows 
Rip 500 DVDs to Seagate Wireless Plus for Entertainment 
Upgrade! Pavtube add ProRes/TV/H.265 MKV Support for Windows 
Src 

Play MKV, AVI, M2TS, TS, VOB on Roku 3 with Plex 

iTunes movie new releases can't play via Roku?


Will Roku 3 play December 2014 iTunes movie new releases? Yes. This article is a tutorail on how to stream iTunes movies to play on Roku 3 by roll off the DRM protection. 

Roku 3 can allows users both to stream video content from the Internet and play movies locally through a USB drive, but the problem is that the supported media file formats are limited. Unlike Apple TV 3 which can access iTunes movies, we can't install iTunes on RoKu 3, let alone playing December 2014 iTunes movie new release like Gone Girl, Jingle All the Way 2, The Good Lie, The Hero of Color City, Frank, etc. on Roku 3 through USB. Why? 


Roku has the USB channel that can play back videos attached to the USB port. You could copy videos (1080P, 720P or lower resolution) onto a hard drive or keychain drive and attach them to the USB port on the Roku XDS. But keep in mind a USB port enables local media playback (supported formats include: MP4 (H.264) & MKV (H.264) video / AAC & MP3 audio / JPG & PNG image) to play on Roku 3.

Videos/Movies purchased or rented from iTunes are in M4V format with DRM protection. That means users could just play the iTunes M4V TV episodes, movies, and music videos in Apple devices but Roku 3 is not included. But no biggie, just as saying goes "There is a problem, there is a solution", I've got a simple workflow to help you roll off the DRM from December 2014 new movie releases and transfer it to most compatible video format for your Roku 3. 

Basically, we need to get this Pavtube DRM Removal - a software can help you accomplish both the steps above in one go. It is highly recommended for its easy-to-use interface, straight workflow and reliable video quality. Now just download this software and follow the tips below to make your iTunes movies playable on Roku 3.(Get Best Tunebite Alternative to Remove DRM from Music and Videos

Now Pavtube Studio provides free trial without time limit; get one and let's start. 

How to put iTunes downloaded December 2014 movies on Roku 3 USB Channel 

Install this Pavtube ChewTune on your computer firstly; note to shut down your iTunes firstly. 


Step 1. Import DRM files 

Download your wanted movies from iTunes Store; click top left two plus icons to import them one by one or from the entire folder. 


Step 2. Choose format 

Click the Format drop-down list and choose Common Video > H.264 Video (*.mp4) as the most compatible with your Roku 3. 


What's more, it is possible to stream iTunes movies to your ChromecastWD TV Live,XBMC and Nexus Player


Step 3. Adjust settings (Optional) 

If you want to turn up/down file size, bitrate, frame rate and other settings, click "Settings" besides "Format" to enter the profile settings windows. You can also check both source and target video & audio specs there. 

Step 4. Convert 

Back to main interface, hit "Convert" to start converting December 2014 iTunes movie new releases to MP4 format for Roku 3. It will launch your iTunes automatically and start conversion simultaneously. After it completed, click "Open" to quick find the converted files. 


Connect a USB memory stick or USB cable of a digital device to the RoKu 3 USB port. Now you can play iTunes movies and music on RoKu 3 for free.

You can see how easy it is to bypass DRM of iTunes both purchased and rented movies and then convert these M4V videos to MP4 that supported by Roku 3 with Pavtube ChewTune.

Here is money-saving trips:


More 

Watch DVD ISO files on ZEISS VR One With 3D Effect 
Surface Pro 3 vs. iPad Pro, Which is Better? 
XBMC iTunes Converter - How to View iTunes Movie via XBMC? 
Rip Blu-ray to H.265 MKV on Windows 10/8.1/8/7 in a Easy Way 
Put Blu-ray to Synology NAS for Roku 3 playback via DLNA 
Put H.265 4K Videos on Roku 3 for Playback 
Rip Blu-ray 3D to MKV Full HD 3D with MakeMKV 
Backup Blu-ray Movies with only Forced Subtitles 

Src 

iTunes movie new releases can't play

Put Blu-ray to Synology NAS for Roku 3 playback via DLNA


Read this article and you will quickly learn how to convert Blu-ray to DLNA on Synology friendly video for streaming to your Roku 3 compatible devices. 


“ What are the specific settings for ripping a DVD to put on a Synology NAS DLNA server for playback on a Roku 3 using the Roku Media Player app? I have tried several settings to create an MP4 with 5.1 sound, following instructions from your web site. (H.264 HD Video MP4 with HD Standards and a few variations). All rips play video perfectly, but there is no sound when played on the Roku 3 Media Player. Any good idea? “

Can Roku 3 read Blu-ray movies from NAS? If you have a large Blu-ray movie collections, you may have this question. If you want to rip and store BD movies on Synology and then plug NAS in Roku 3 and use Roksbox app for enjoyment, you're definitely being the right place. In this article, we will show you a quick-start guide on ripping Blu-ray to NAS for playback on Roku 3 compatible video formats with high output quality.

Hot Search: Roku ColumnApple TV 3 ColumnNexus 7 ColumnTiVo Column

Well, To enable Roku 3 to play Blu-ray files from NAS, all we need to do is to convert Blu-ray to Roku 3 supported video formats with a professional Blu-ray to MKV/MP4 for Roku 3 Converter. Here, Pavtube BDMagic can help you converting Blu-ray/DVD to NAS then stream to Roku 3 by DLNA. Of course, this Blu-ray ripper can help you convert commercial Blu-ray movies to AVI, WMV, FLV, MOV, etc as well. What's more, it can also enable you to rip Blu-ray for directly playback on Android, iOS, Windows based devices. If you are using Mac, you can also use theBDMagic for Mac. Refer to the guide on Mac.

How to Rip Blu-ray movies to Synology NAS for DLNA Streaming on Roku 3

Step 1: Load Blu-ray movies.

Install and launch Blu-ray to MKV/MP4 Converter, and then click the disc icon to import your source movies to this program. Set your wanted subtitles and audio track from the drop-down box of "Subtitles" and "Audio" tab.


Step 2: Select Output format.

Select a format for conversion. To convert Blu-ray to MKV video, press on “Format” and choose “Common Video>> MKV(Matroska) Video (*.mkv)” format.


Tip: If the default parameters can’t meet your needs, you can click “Settings” to change the video encoder, resolution, frame rate, etc. as you wish.

Step 3: Start Blu-ray Conversion.

Hit convert button to start converting Blu-ray movies to MKV/MP4 for NAS sharing. After the conversion, click "Open" to quick locate the converted video; now you can stream converted Blu-ray files through NAS to HDTV, PS3 and other DLNA device for enjoyment anywhere you like.

After read this playback tips for Roku 3, you can easily solve your Blu-ray to NAS device for playback on Roku 3 for Sharing or viewing.


More 

Watch DVD ISO files on ZEISS VR One With 3D Effect 
Surface Pro 3 vs. iPad Pro, Which is Better? 
XBMC iTunes Converter - How to View iTunes Movie via XBMC? 
Rip Blu-ray to H.265 MKV on Windows 10/8.1/8/7 in a Easy Way 
Put Blu-ray to Synology NAS for Roku 3 playback via DLNA 
Put H.265 4K Videos on Roku 3 for Playback 
Rip Blu-ray 3D to MKV Full HD 3D with MakeMKV 
Backup Blu-ray Movies with only Forced Subtitles 

Src 

Put Blu-ray to Synology NAS for Roku 3 playback 

Put H.265 4K Videos on Roku 3 for Playback

Does the Roku 3 play H.265 files? This guide will show you how to stream 4K H.265/HEVC videos to Roku 3 for enjoyment on big screen.

With Roku 3, consumers basically got an upgraded CPU and a gimmicky headphones jack in the Roku remote. Most of you probably have had the pleasure of using an Roku 3 for enjoyment any movie files you want. If you got some H.265 movies, why not add H.265 to Roku 3 for playback? Don't know how to archive it? Read on to get the solution. 

As far as we know, Roku supported media file formats are restricted to MKV (H.264), MP4 (H.264). H.265/HEVC 4K movie is not included here. So, how to prepare your H.265 videos for playback on Roku 3? Luckily, there's a workaround that can make your movies playable on Roku 3 - Encode H.265/HEVC to H.264 MP4 videos for Roku 3.

To get it done, all you need is a reliable H.265 converter. Just like the way it is dealing with 1080p HD and 4K videos, the upgraded Pavtube Video Converter Ultimate is surely in the support of converting 4K H.265 Video in any format sand creating H.265/HEVC MP4 video faultlessly. (Here is review)

Overall, this program is a completely professional H.265/HEVC encoder, decoder, player and editor. It provides three new output format presets for H.264, and one for H.265 in Common Video Option for better playback. In addition, this H.265 Converter is also available to decode your 4K H.265 files to Roku video for watching.

To begin, free download Pavtube Video Converter Ultimate


Step 1: Import 4K H.265 files to the converter

Install and run H.265 to Roku 3 converter, and then click the “Add” button to load the .H.265 videos. You can also use the drag-and-drop method to load the media files to the application UI.


Step 2: Select Roku 3 supported format

After the files are added, click Format > Common Video and set output video format as mp4. The reason mp4 is the target format is that by packing the videos in mp4, the file size will be reasonable small and the video quality remains. HD MP4 video from “HD Video” is suitable.


P.S. Click the Settings icon to adjust video and audio parameters on the Profile Setting as you need to get the best quality video.

Step 3: Start 4K H.265 to Roku 3 conversion

Click the “Convert” icon under the preview window, and the H.265 Converter will start converting H.265 to Roku 3.

Step 4: Import 4K H.265 to Roku 3

After the conversion, get the output files by clicking the Open button. Now the converted H.265 video is ready to be  streamed to Roku.

Now you can enjoy your 4K H.265 movies with Roku 3 via HDTV at your will. Enjoy. Find more solutions at Roku column.

More related:
Source:http://bestvideosolution.blogspot.com/2015/09/playing-h265-hevc-files-on-roku-3.html

    Enjoy 500 DVDs to Seagate Wireless Plus for Entertainment

    We travel a lot an have over 500 DVDs in hand, so I bought a 2TB Seagate Wireless Plus then my family members don't have to fight over the laptop for watching DVD movies. In fact, we can get together with friends and family to enjoy DVD movies via Wireless Plus, the question is: how to convert DVD for uploading to Seagate Wireless Plus?


    Here what you need is to make use use of a professionally designed DVD to Wireless Plus converter to rip Seagate Wireless Plus video files. And Pavtube DVDAid would be your best choice, which can easily rip DVD movies to Wireless Plus compatible H.264 video, MPEG-4, and Motion-JPEG for video, and AAC, MP3, Audible (formats 2, 3, 4), Apple Lossless, A IFF, and WAV for audio quickly with excellent output video quality.

    Besides converting DVD files, it can also compress a DVD to smaller file size, saving the space for your console if you need. In addition, the built-in editor allows you to customize your DVD videos to get the very part and effect you want with ease. I have tested it, now after perfectly ripping DVDs, I can get my DVDs uploaded to my 2TB Seagate with ease and freely watching on my mini iPads, 1 kindle and 1 nook. The equivalent Mac version is DVDAid for Mac. Just get the right version and copy DVD to Wireless Plus with ease. (Windows 10 or Mac Yosemite are supported). 


    Other Download:

    - Pavtube old official address: http://www.pavtube.cn/dvd_ripper/
    - Cnet Download: http://download.cnet.com/Pavtube-DVDAid/3000-7970_4-76158510.html

    1. Load DVD movies

    First, insert your DVDs into DVD Drive, and then drag the DVD files to the program; Or you can get to "File" Menu, click "Load DVD" to draw into DVD movies you want to rip. DVD folder and ISO image files are supported as well.


    2. Select Seagate Wireless Plus compatible formats

    Click the Format bar to select output profile for your Wireless Plus, say "H.264 Video(*.mp4)" from "Common Video".


    3. Convert DVD movies to Seagate Wireless Plus

    After all necessary settings, you can just click the "Convert" button to start converting your DVD movies. After the conversion, click Open to get the output files for your Seagate Wireless Plus.

    4. Connect Seagate Wireless Plus to computer for uploading

    Now you can copy the converted DVD files to your Seagate Wireless Plus via USB.

    Tip: Free apps are available across Android, iOS, and Kindle for download, and after downloading the app, users can view available wireless networks and select the Seagate Wireless. And content can be played in many different ways, via the Media app on iOS, Android, or Kindle Fire, via any browser, via Apple Airplay or to any DLNA devices via minidlna, which is built into the OS.


    To play your converted files on your mobile devices, your just need to tap the movie file and play it. Now you have successfully carry your entire DVD media library with you with the Seagate Wireless Plus Portable Hard Drive. Just enjoy while traveling with your family!

    Want to get more DVD entertainment? Rip DVD to your Nexus 6/9iTunes 11/12 library or Drobo 5n and TV

    Read More:

    Source: http://onebestsoft.com/upload-dvds-to-seagate-wireless-plus/